Wednesday, September 26, 2012

Happy Fall!

In Honor of the first days of Fall, we are putting our Fall Center Packet up on Teachers Pay Teachers and Teachers Notebook.


This is an annual celebration in our First Grade Classrooms! Usually around Halloween, we are just finishing up our Properties of Matter Unit for our Science Curriculum. Throughout the unit we investigate all different specifics of Matter. We learn what it is, we learn how to identify the different states of matter, we use our senses to describe matter, and we come up with lists of property words to describe matter. (This translates nicely into Writer's Workshop!) 

We have developed a Fall themed culminating Centers Day for our unit on Matter. We use Fall things to describe, compare, contrast, graph, and write about. They are full of fun and learning all in one day.

Of course you can do the activities individually if you choose, but each has merit in it's own way.

Take a look. If you see something you like and would like us to put up the activity separately, let us know. We'd be happy to do that also!

There are 4 centers: 1. Comparing and Contrasting Apple Juice vs. Apple Cider, 2. Comparing 3 different types of Apples, 3. Pumpkin Observations, and 4. Cookie Frosting (changing the appearance of matter by changing the color of the frosting).

We do these centers all in one day and the students rotate through them in 15 – 20 minute intervals. We have parents in to run the actual centers and we teachers circulate and participate as needed. It’s a great way to invite parents in for participation in the classroom. Our room mothers have been great in the past several years and usually organize all of the purchasing of materials from the parents.

It’s a really fun activity to do them together, but they can also be done separately on different days. It’s up to
you!


Apple Observation Materials Included
Hard Copy or Smart Board File for the Graph!


 Compare and Contrast Apple Juice and Apple Cider Materials Included- Graph your favorite!
Hard Copy or Smart Board File for the graph! 


Changing Matter Materials Included- Frosting!


Pumpkin Observations Materials Included 


Sunday, September 23, 2012

Let's Talk about Work Stations and Literacy Centers!

I'm starting to implement my Work Stations! Need some ideas and great materials? 

As the students become more familiar with classroom routines and expectations, I start to implement my Work Stations or Centers for literacy and reading practice.

When we designed our Phonics Workshop materials we intended them to be used throughout the day. Well, our materials do double or triple duty in our classrooms.


  • Word Work Station #1 is the Word Wheel Station. In this station we put copies of past word wheels we have done. As we go through the patterns, we let the students choose which word wheel they want to make or one they think they need some practice with. Remember, it's really o.k. to have students create or make something more than once. This is practice and the more they practice, the better they get. In the Station basket there is a folder with the word wheel. There is also a white board, marker, and eraser for each student. After making the word wheel, they read it two times to their partner. Next, they write the words on the white board. Again, they are making it, reading it, and writing it. If there is still time they can make a second word wheel or choose to make a flip book, word web, or word book to go along with their word wheel. It gives the students some academic choice and because they've used all of the materials before, they are immediately set up for success.
    • Once we go through many word patterns, we put a laminated copy of the word wheels done and eliminate the step of making the word wheel again.

    • Word Work Station #2 is the Word Sorting Station. In this station we put copies of past word sorts we have done. The premise of practice is the same. The more they practice the better they get. In the station basket there are folders with the different word sorts in it. There are scissors, glue, pencils and crayons. They complete the word sorts with their partners. They discuss which one they'd like to do. They color the chunks yellow and green to differentiate the patterns. After they read the sort to their partner. First by column and then by row. If they finish and there is still time, they can choose to make a flip book, word web, or word book.
    • Buddy Reading Station - We put our fluency grids of patterns we have worked on as part of our Buddy Reading Station. The students take turns reading the words to see how many they can read in a minute. 
    • Overhead Station - We put copies of all poetry in our overhead station. The poems are targeted toward word patterns and chunks so it's shortened application to text. Check out the Scholastic website for great poetry for word families or patterns. They have great song books too. We have also been known to type of words or sentences containing the targeted patterns.
    • Word Chunk Search Station - We use the word chunk search for our more advanced readers at the beginning of the year. It enables those students to read and track any words they find that belong to the targeted patterns.
    • Recording Station - Again, the poems and songs are put into a binder for the students to read into a tape recorder. I found cassettes online and the students read into a microphone and record themselves practicing the poems and songs with the targeted chunks. Again, check out Scholastic. They have some great books of poems and songs.
     
    • Sound Sorting Station - We print out copies of the picture cards for our Sound Sorting Station. We put a pocket chart in the room for this station. I've even done it on the floor on construction paper in the past. In the station bin are bags with the cards in them of word patterns we have studied. For example: in one bag the cards for at and ap are there to be sorted. Once -ag is done, they get printed and put in the bag. Then once -ack is done, the cards get printed and put in the bag and so on. Once we get to a second vowel, short o, there would be bags added for -at and -ot, -ag and  -og, -ack and -ock and so on. The students work in a pair. They pull a card and sort it under the correct header. After they sort, they read the pictures by pattern and then by row and then write the words on their white boards, which are in the station bin. After they finish, they can pick another picture sort to do.


    As you can see, our materials that we use for phonics can be used over and over in the classroom. It provides the students consistency throughout their day. They become independent in their practice and learning. After a few weeks, they run the stations themselves because they are successful. They learn the process and you will be able to filter the new content through that process. 

    Check out our vowel packs! They all have all of these materials plus all of your phonics instruction!


    Monday, September 17, 2012

    Picture Sorts, Picture Sorts, Picture Sorts!

    Let's talk some more about sorting....Picture Sorts!


    Word Web on Smart Board
    With Phonics Workshop you get picture cards for 48 different word patterns. We use these picture cards to create our class word web (bubble map) on our Smart Boards. (The Smart Board Files are included in the vowel packs.) You can use the hard copy picture cards to tape to a chart paper and make your class word web (bubble map) also. (It's what we did before we had the Smart Board.) We would show the picture card, count the sounds, identify the initial, medial, and ending sound, tape it to the chart paper and write the word underneath the card as students wrote it on their white boards in front of us. We would circle the picture and the word and draw a line to the middle sorting card (the word pattern; ex. -at) to show that it belongs to written pattern and the sound of the pattern. We would post the charts in our classroom to use for student support and practice when needed.


    ap picture cards
    at, an, & ap sorting headers
    at picture cards
    What's even better about these cards, is that they can be printed over and over. If you have a color printer, it's even better, but they still look great in black and white. We also use the cards for a sound sorting work station. After we do -at and then -ap, we make copies of the cards and put them in a bag with the header cards. We teach the students to 'read' the pictures and sort them accordingly. Each student has a white board and after the 
    pictures are sorted, they write the words together on their white board. Just another authentic practice that our materials can be used for. We were very mindful of being able to have all of our materials do double or even triple duty. As the word patterns progress, we just add them to the bag in the sorting station. The first bag ends up with at, ap, ag, an, ack, and all in it. Then we start short o. The pictures are printed out again to create a short o bag which grows from ot and op, to ot, op, og, and ock. We print out more sets of card to create more types of sorts like at and ot, ap and op, ag and og, and ack and ock. Once we start short i, the same happens again. The possibilities with these cards and sorts are endless.

    We also use the cards for interventions. Struggling students use the picture cards they are already familiar with to learn to count sounds orally and then write the words that the pictures represent. The more practice they get, the better they get, the more they advance. Because they are already familiar with the picture cards, they feel more confident in themselves and don't get lost in a multitude of directions.

    When you purchase a vowel pack, all the picture cards for those word patterns are there. We also have packaged the picture cards for all 48 word patterns as a pack. We do understand if you would like to use some of our materials for supplemental items to what you already teach.


    These are just the word sorts; Check out all the vowel packs on the left hand margin of our blog if you need the other materials as well!


    Saturday, September 15, 2012

    Word Sorts, Word Sorts, Word Sorts!

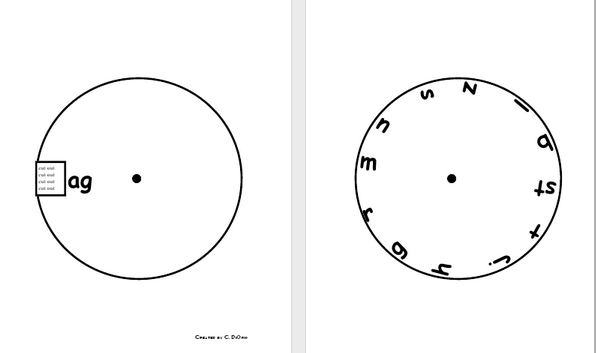
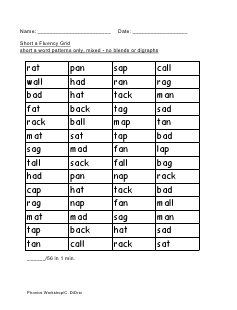
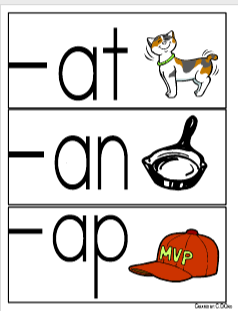
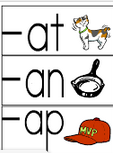
    Do you teach students to sort? It's an essential skill. Brain research shows human beings learn better when they are able to classify and assimilate things into categories. Teaching young students to do this helps them make sense of the world around them. We do it for math and we also need to do it for reading instruction. It adds to and deepens their understanding. There are resources available in the market for sorting words and pictures, but we found the need to address the issues of the students actually being able to read and decode the words they were sorting. Many of our materials had a lot of words students couldn't read yet. What is that about? Most children can look at a word and sort it according to pattern, but can they actually read the words in columns and then rows after they are sorted? When we use our phonics word sorts they are organized according the patterns we teach. For example: we teach -at, and then -ap. The first word sort is -at and -ap words. Next we teach -an. The word sort included with the an pattern is -at, -ap, and -an. Next is ag. The word sort that goes with -ag is -at, -ap, -an and -ag words. Get the idea? It goes that way throughout Phonics Workshop. When we finish with short a we move onto short o. The first pattern is --ot. The word sort that goes with -ot sorts -at and -ot words. The next pattern is -op. The word sort is ---ot and -op. We have created word sorts that discriminate by medial sound AND by ending sound. When you move through short o there are word sorts for short o patterns and short o patterns vs. short a patterns. During short o we also transition from cut and paste sorts to written sorts. During the instruction of short a sorting, we are actually teaching the skill of sorting. We also have added a mystery chunk as the sorts progress. There is an additional column that has a chunk or pattern that was already taught. Love to reinforce the reading of past patterns! After short o comes short i. It's the same. The first short i pattern is -it. The first short i word sort is -at, -ot and -it words. It goes on like that through all the short vowels and then in the long vowel patterns. The first long vowel pattern is -ate. The first long a word sort is -at and -ate words. Wherever we could use a discriminatory pattern, we did. We built the word sorts with a scaffolding effect so students could assimilate new learning and compare it with something they learned already. It's built for success in sorting, reading, and application.

    We have bundled the word sorts for Phonics Workshop in two different ways. The word sorts are part of the vowel packs. When you purchase the short o vowel pack, all of the short o word sorts are in it. We also decided to bundle the word sorts for all of Phonics Workshop in one pack in case you only needed the Word Sorts as a supplement to what you are teaching. For $9.00 you get all 54 word sorts for all of Phonics Workshop. 

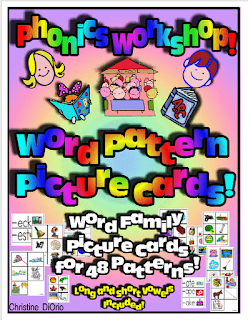
    54 Word Sorts for 48 Word Patterns!

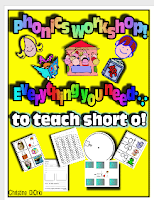
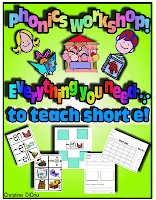
    All the short vowel packs! Word Sorts are included in each of the packs!


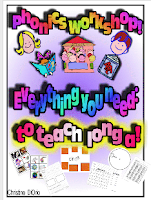
    All the Long Vowel Patterns - Word Sorts are included in each of these too.


    Of course you can also purchase all of the short vowel packs together at a discounted price instead. This has it all. Every material for each of the short vowels.
    *The zipped long vowel pack is coming soon too!


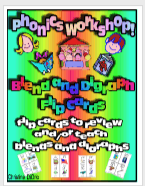
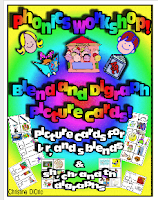
    I should also  mention that during short o instruction, we implicitly start teaching blends and digraphs. We use our blend and digraph flip cards as a 1 min go through aloud during our meeting times or even snack times. (b-l, /bl/ blocks, b-r, /br/ bridge, etc.). The blends and digraphs start showing up more during short o materials. (Word Sorts and in the Word Wheels) We also have picture cards for 18 different blends and digraphs that we use for small group instruction when needed. For the most part, students begin picking it up as we go through the cards and noticing the blends and digraphs during small group or individualized instruction. We also go through our poetry binders and highlight all of the blends and digraphs we can find with a green crayon. It all helps them to learn to identify and decode.

    Blend and digraph flip cards for quick instruction
    Blend and digraph picture cards