Hi Everyone,
It's been a few days since I posted. I've really been working hard on organizing our materials on Teachers Pay Teachers. I am so sure about the content and integrity of our materials, that I want them to be as organized as possible.
I also wanted to share the way Phonics Workshop works and what it actually looks like in the classroom. I want to take you through the process with the second word pattern, ap. (at is done first, but there is not a word sort until you get to ap) It's a basic 3 day process for each word pattern (family).
***We call them patterns rather than families because we have found great success in teaching students to decode by both pattern and sound by sound. (onset and rime - /c/ /at/ and individual sounds - /c/ /a/ /t/) It reaches all learners and teaches them the decoding process a little bit easier. We practice start it up, what's in the middle, and end it over and over again. It helps to isolate those sounds and then translate them to the actual letter. We also count sounds on our fingers. The best manipulative of all! Their fingers!!!
Day 1
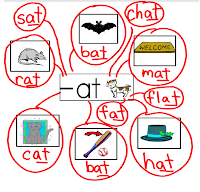 |
| class word web created on the Smart Board |
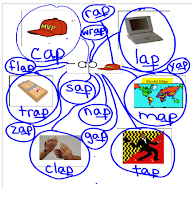 |
| ap word web created on the Smart Board |
The Smart Board file is exported as an image and placed into a Publisher File or any program that will allow you to tile print a poster.
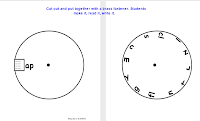
After the minilesson, students return to their seats to make, read, and write the words on their word wheel. We keep word pattern journals so students get the extra writing practice.
That's it...day 1 of ap complete..let's move on to day 2
Day 2
Day 2 is the Word Sort. On Day 2, the minilesson is a class word sort. Students set up their whiteboards like a word sort and you set it up on the Smart Board or Chart Paper. (at in one column and ap in the other) You can draw it on the Smart Board or you can use one of the pre-made sorts on the Smart Board. You dictate a word, students figure out what column it goes in and writes it on their whiteboard. (Don't forget to count the sounds again and get them listening to that ending pattern.) Ask a student to tell you what column it's in and how to spell it and write it on the class sort. Continue for 3 words of each. Read by column and then by row carefully decoding. Students return to their seats to complete the paper sort independently or with support if needed. The short a word sorts are cut and paste to teach them the skill of sorting. That changes when you get into short o. The word sorts get progressively more intricate and detailed as you progress through the patterns. We highlight the chunks or patterns. (yellow for column 1 and green for column 2) It helps to identify the patterns so they notice them in text. After the sort is completed, they read it by column and by row to a partner.
Day 3
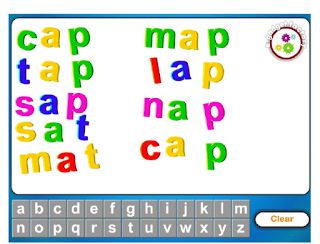 Day 3 is a Word Ladder. We use the fridge magnets page in the Notebook Software for the Smart Board, but you can do this with magnetic letters or just written on a whiteboard or chart paper. For the minilesson, students gather with their whiteboards. You dictate a word and they write it in the middle of their whiteboard. (large enough so that they can change one letter and one sound easily.) Ask for volunteer to spell the word. Pull up the letters to spell the word. Then ask them to change one letter and one sound to change cap to tap. In the beginning you need to break it up and isolate sounds so they get the idea of the skill. They erase the letter to change on their whiteboards and replace it with the correct letter. Then change again for about 5 - 10 words depending on time. As you progress through the patterns, change the sounds to show patterns you've done. When the students go back to their seats, they can complete a flip book, word book, or word web of the pattern you are working on. They love to do this!
That's it...day 1 of ap complete..let's move on to day 2
Day 2
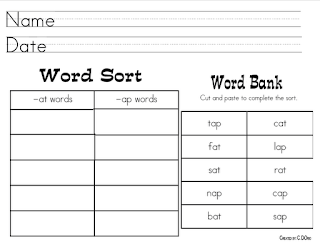 |
| at and ap word sort |
Day 3
 Day 3 is a Word Ladder. We use the fridge magnets page in the Notebook Software for the Smart Board, but you can do this with magnetic letters or just written on a whiteboard or chart paper. For the minilesson, students gather with their whiteboards. You dictate a word and they write it in the middle of their whiteboard. (large enough so that they can change one letter and one sound easily.) Ask for volunteer to spell the word. Pull up the letters to spell the word. Then ask them to change one letter and one sound to change cap to tap. In the beginning you need to break it up and isolate sounds so they get the idea of the skill. They erase the letter to change on their whiteboards and replace it with the correct letter. Then change again for about 5 - 10 words depending on time. As you progress through the patterns, change the sounds to show patterns you've done. When the students go back to their seats, they can complete a flip book, word book, or word web of the pattern you are working on. They love to do this!
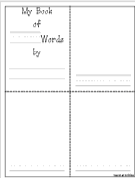 |
| Word Book |
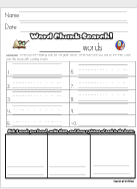 |
| Word Chunk Searh |
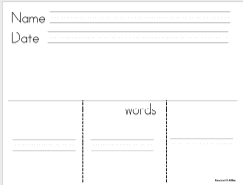 | |
| Flip Book |
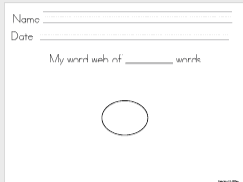 |
| Word Web |
That's it! That's the 3 day process in a nut shell. You can use the other blanks throughout the 3 days as practice, morning work, handwriting practice, stations, homework...etc.! We created these materials to do double or triple duty! The kids love using them and are proud of their ownership over how they use them. They are independent with these materials once they learn to use them. It was really important to us to save time, not create a million little pieces to manage...how many pieces for phonics have you lost over the years???? I'm telling you...this is so much easier!
There is also application to text, which I will blog about in the near future. It's time to use all of those phonics poems, songs and decodable books to apply the skills we are teaching...look around your classroom..they are probably everywhere!
After the 3 day process is completed, you start it over with a new pattern. You do the new patterns until the vowel is complete and then you use the progress monitoring tools to assess what your students have learned...
The process stays the same! The students learn the teaching and learning process and take ownership of it. Minilessons get quicker. Practice time gets quicker. Students embed the decoding process...they read!
All of the materials are available on our Teachers Pay Teachers Store!
Phenomenal First Grade Phonics and Reading
Phenomenal First Grade Phonics and Reading
at, ap, and an are free! Print them! Try them! Then take a look at the rest! Phonics made easy, effective, and manageable!

This 3 day approach to teaching phonics is AS EASY AS IT LOOKS! I am always amazed at how quickly my students pick-up and internalize the decoding strategies that are embedded within each lesson. Students can rely on the predictability of each day's lesson as new material and word patterns are filtered through. Reading these blogs gets me excited to begin the school year and turn my nonreaders into lifetime readers!
ReplyDeleteMeghan Chase
happy valentines images
ReplyDeletehappy taddy day
kiss day wallpapers
happy promise day quotes
kiss day message
July 2017 Calendar
ReplyDelete
ReplyDeleteEaster greetings cards 2017
easter religious quotes
easter hd cards
Download Calendar
ReplyDeleteVisit Here
June 2017 Calendar
June Calendar 2017
June 2017 Calendar Printable
This comment has been removed by the author.
ReplyDeletesee more Windows 7 Home Premium for 64-bit iso techniques have all of the capabilities of the Windows see more Hello, friends as you can see that we have brought up a great collection click here
ReplyDeletemessage for valentine
ReplyDelete